Resources
Tartans
Books
Making the Pleats
Once you have all of your measurements and calculations on your record sheet you are ready to begin putting together the kilt. You must be accurate in marking your fabric and lining up your pleats for a superb looking kilt.
Stitching the pleats is the most time consuming part of making the kilt. Accuracy is crucial at this stage as small errors in each pleat compound over the entire pleated area. Each pleat is folded, sized and stitched before the next one.
The first pleat
Select a thread that matches the color of the left hand apron edge. Thread your needle with just enough thread to sew an 8″ seam. Wax your thread and knot the end securely.

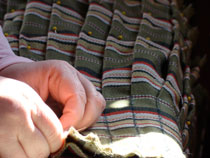
 Locate the mark for the first pleat next to the apron. Fold the fabric under to roughly the chalk marks. Pin the fabric about ¼″ away from edge of fabric. Pinch the apron tightly to the pleat with your thumb and fingers. Bring the needle through the back side of the pleat just above the bottom of the fell, catching the apron exactly at the bottom of the fell. Pull the needle up until the thread is taut. Continue stitching the pleat from the bottom of the fell to the top of the kilt using a fine edge stitch and pulling the thread to the right.Top
Stitching the remaining pleats
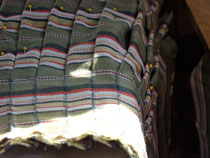
Continue to pin fold and stitch the remaining pleats. Make sure you are folding the next pleat before you stitch the previous pleat.
 Once you have stitched the last pleat you will begin stitching the inverted pleat at the underapron. Fold back the edge of the last pleat at the bottom of the fell. Place several stitches in the fabric on the back of the pleat about a half inch from the edge. Fold the pleat back down and with the pleat edge lined up with the chalk line at the fell, pull the thread through only one thickness, stitching the last pleat to the underapron from the fell to the waist.Top

