


Merge to HDR Pro
By using Merge to HDR Pro, we will use 3-5 photos of the same picture, but each picture will have different exposures. When you take your pictures, be sure to use a tripod for stability. Take your photos with some high, normal, and low exposures. Now, we will merge them together to get all of the best pixels from each photo you took, to make the ultimate photograph.
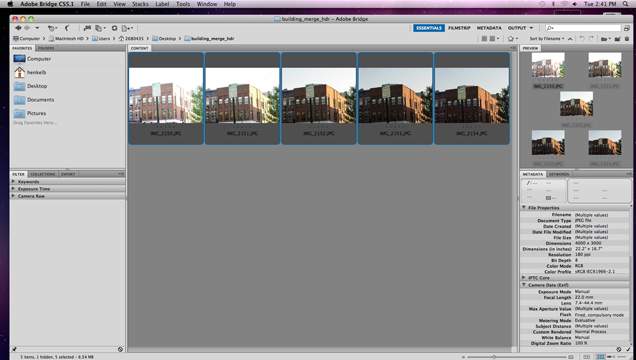
Step One
Open Bridge and select the photos you want to use for your HDR photo. Generally choose 3-5 photos.
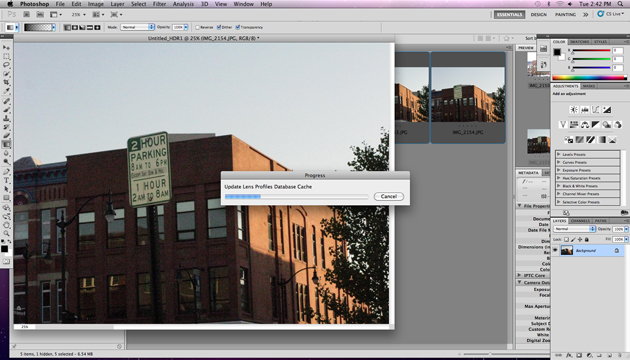
Step Two
Go to Tools, and select Photoshop, and Merge to HDR Pro.

Step Three
Wait for your photos to merge themselves together. This should only take a minute or two.
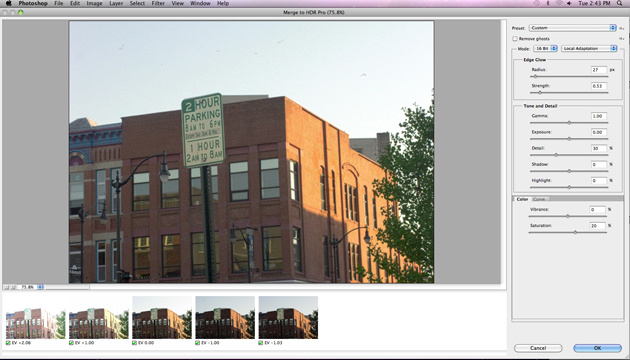
Step Four
Adjust the tonal range using the selections on the right. Play with your options, as each thing you do will change the style of your photo.
Step Five
If you absolutely love how your photo turned out, save your settings so you can use it again by clicking Choose Preset > save Preset. Go to Load Preset next time you want to use your custom preset.